Ford Parts Wiki | GM Parts Wiki
Home | Search | Browse | Marketplace | Messages | FAQ | Guest
Prev

 Next
Next
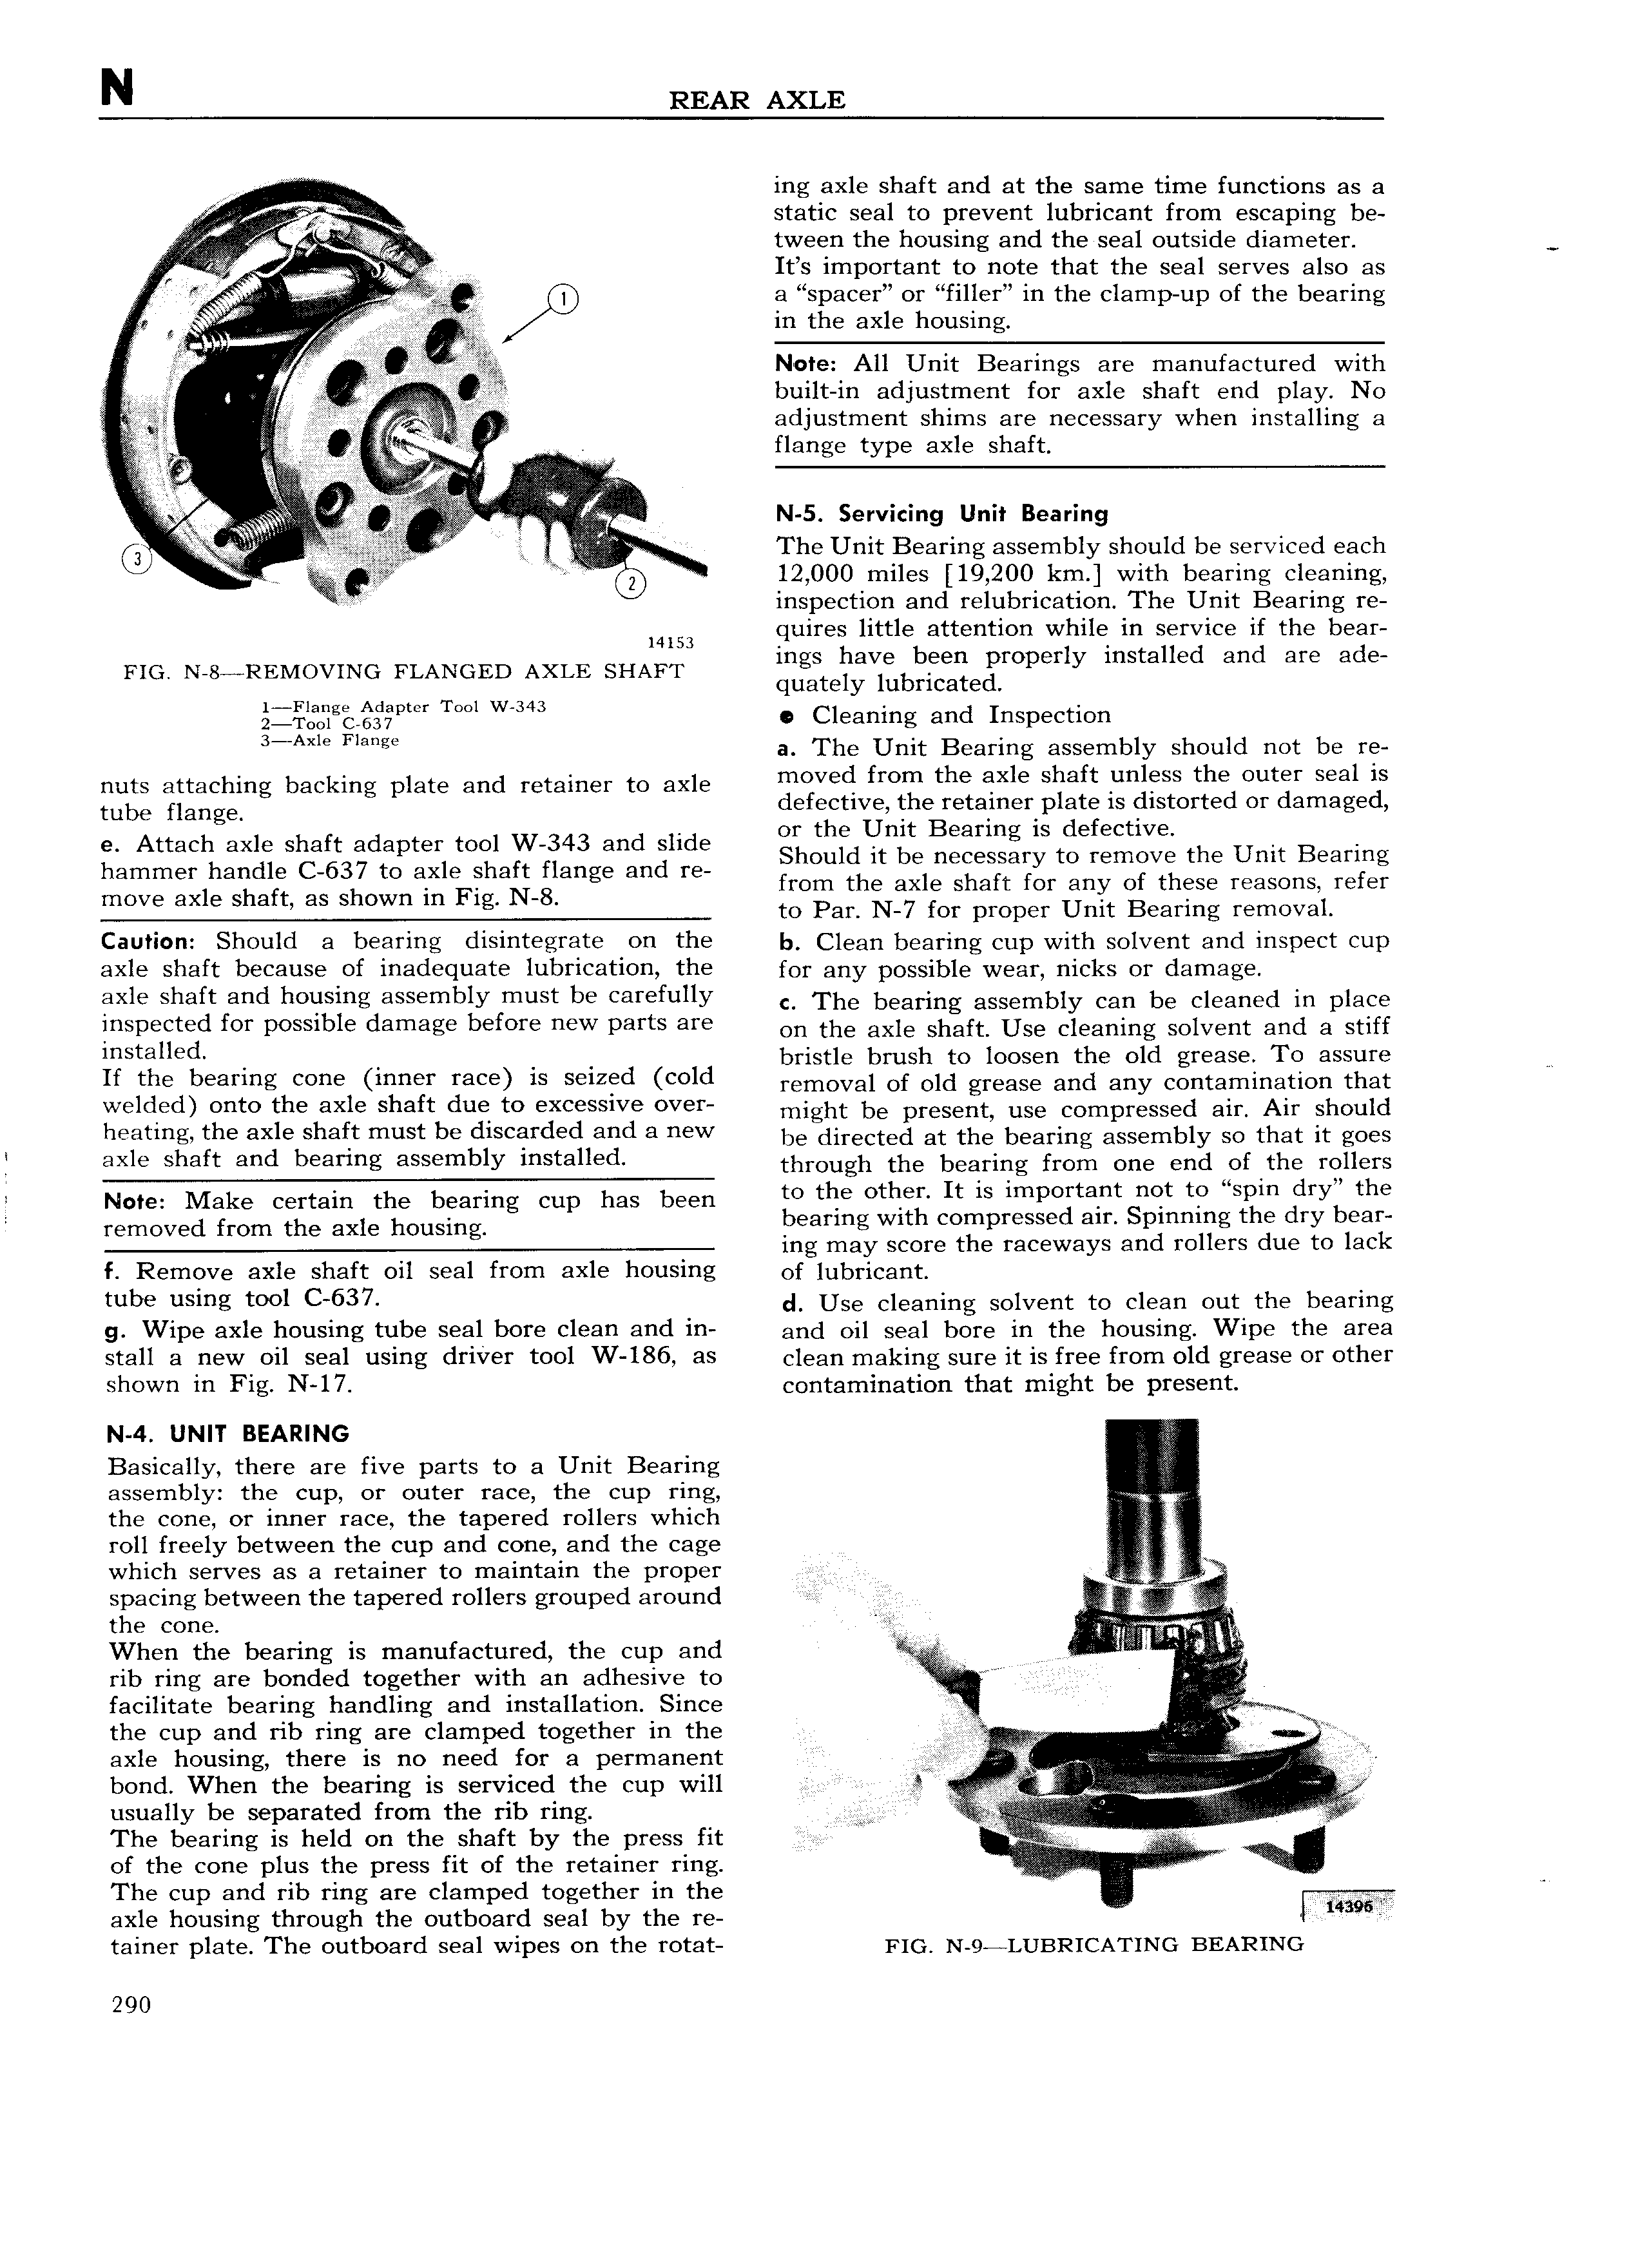
N REAR AXLE ing axle shaft and at the same time functions as a A V static seal to prevent lubricant from escaping be V at tween the housing and the seal outside diameter V l It s important to note that the seal serves also as Q a spacer or filler in the clamp up of the bearing gin t ttr tr A in the ext housing 5 5 i y 2 Note All Unit Bearings are manufactured with i 4 Z ies W VV 2 built in adjustment for axle shaft end play No 4ii at ji l adjustment shims are necessary Wh i SY3lliI1g 3 3jE i i V flange type axle shaft 5 ji ZIE 4 T V V it i s p g Z N 5 Servicing Unit Bearing QJ V The Unit Bearing assembly should be serviced each A 6 12 000 miles 19 200 km with bearing cleaning I inspection and relubrication The Unit Bearing re 14153 quires little attention while in service if the bear FIG N 8 REMOVING FLANGED AXLE SHAFT ings have been properly installed and are ade quately lubricated f i g i2 j pt r T l W843 0 Cleaning and Inspection 3 Axe ange I a Thce fUn1tt iear11 ig aqssimbly shtphuld riot be Ire nuts attaching backing plate and retainer to axle mOVQ mm Q QX Q S 3 Im QSS Q Ou BY SQ3 IS tube flange defective the retainereplate is distorted or damaged e Attach axle shaft adapter tool W 343 and slide g lgE dlin t Egiggggf tiefggggiz the Unit Bearing hammer handle C 637 to axle Shaft flange and re from the axle shaft for any of these reasons refer to Par N 7 for proper Unit Bearing removal Caution Should a bearing disintegrate on the b Clean bearing enp with solvent and inspect cup axle shaft because of inadequate lubrication the for any possible wear nicks gr d3m3ge axle shaft and housing assembly must be carefully c The bearing assembly can be Cleaned in place lnSpQ tQd for pOSS1b1Q damage bQf YQ HQW parts are on the axle shaft Use cleaning solvent and a stiff mStauQd bristle brush to loosen the old grease To assure H the bearmg C nQ m Qr raw ls SQIZQC1 Cold removal of old grease and any contamination that welded onto the axle shaft due to excessive over might be present use Compressed ein Air Should iwatingi thQ QXIQ Shaft must be diS YdQd and 3 HQW be directed at the bearing assembly so that it goes T HXIQ Shaft and beamlg 3sSQmblY mStauQd through the bearing from one end of the rollers i N t M k t th b h b to the other It is important not to sp1n dry the reznived irgmcfgeazzle lfeusiilgng Cup as Gen bearing with compressed air Spinning the dry bear ing may score the raceways and rollers due to lack f Remove axle shaft oil seal from axle housing of lubyicanp tube usiag tool C 637 cI Use cleaning solvent to clean out the bearing 9 Wip axle housing tube 931 bore l 3 SHCI i and oil seal bore in the housing Wipe the area Stall 3 W oil 931 using dYiV Y tool W 186 35 clean making sure it is free from old grease or other shown in Fig N 17 contamination that might be present N 4 UNIT BEARING Basically there are five parts to a Unit Bearing I assembly the cup or outer race the cup ring y the cone or inner race the tapered rollers which gg roll freely between the cup and cone and the cage i 5 which serves as a retainer to maintain the proper A spacing between the tapered rollers grouped around 3 the com When the bearing is manufactured the cup and s r I rib ring are bonded together with an adhesive to i i facilitate bearing handling and installation Since i U s the cup and rib ring are clamped together in the V E asiv A j t r axle housing there is no need for a permanent afi bond When the bearing is serviced the cup will gt i usually be separated from the rib ring sssss i i i i i The bearing is held on the shaft by the press fit i i i Z a V g k s a of tl l COl l plus the press fit of the retainer ring sj l LX V I The cup and rib ring are clamped together in the n axle housing through the outboard seal by the re ii 14395 tainer plate The outboard seal wipes on the rotat FIG N 9 LUBRICATING BEARING 290

 Next
Next