Ford Parts Wiki | GM Parts Wiki
Home | Search | Browse
|
Technical Service Manual January 1975 |
|
Prev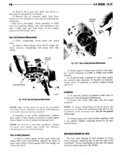
 Next
Next
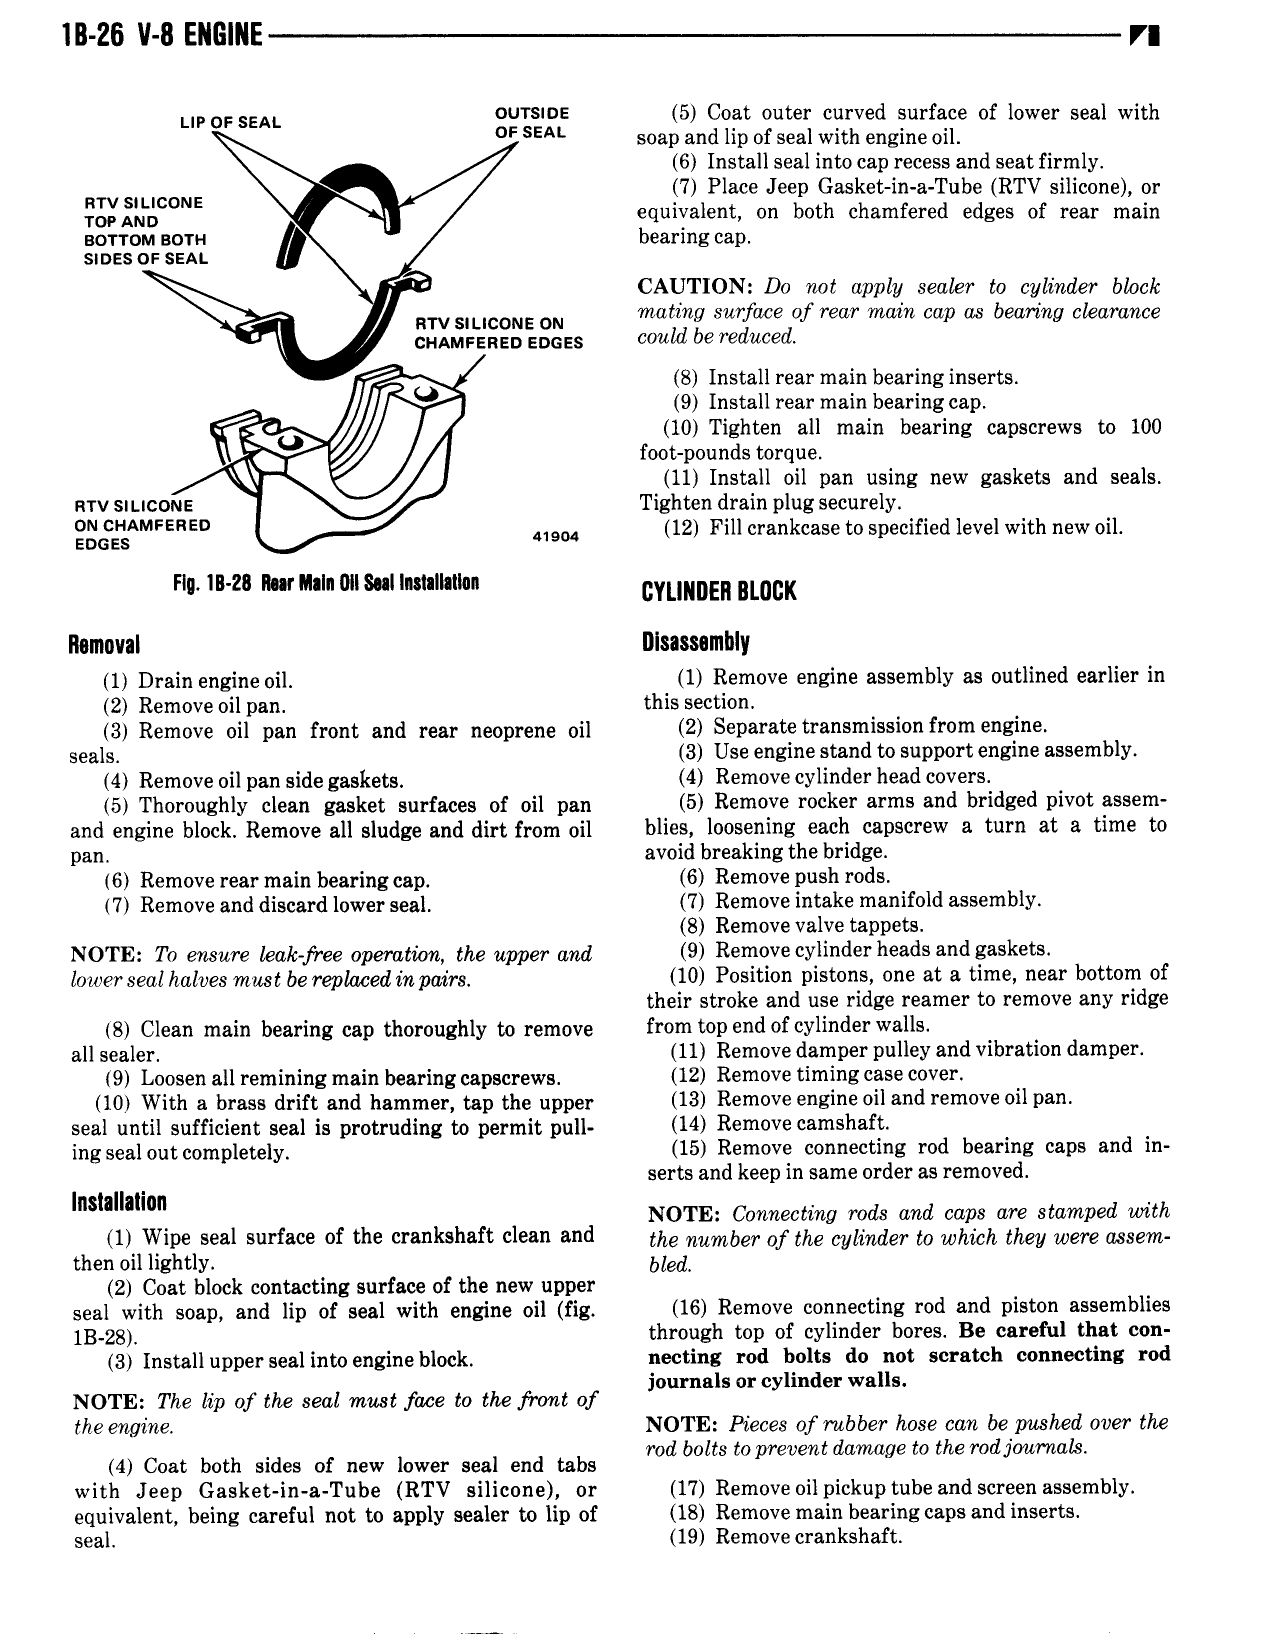
lll 26 V 8 EllG NE VI L OFSEM OUTSIDE 5 Coat outer curved surface of lower seal with OF SEA soap and lip of seal with engine oil 6 Install seal into cap recess and seat firmly 7 Place Jeep Gasket in a Tube RTV silicone or T i h E equivalent on both chamfered edges of rear main bearing cap srzsmzzi 0 CAUTION Do not apply sealer to cylinder block RW SMCONE ON mating surface of rear main cap as bearing clearance crmmrenen ences Gould be ed ed B Install rear main bearing inserts 9 Install rear main bearing cap 10 Tighten all main bearing capscrews to 100 foot pou nds torque 11 Install oil pan using new gaskets and seals n rv siucone Tighten drain plug securely gg AMFERE 41904 12 Fill crankcase to specified level with new oil Flu IB 28 nur mln 0 l8 l 1I ltlllm CYLINDER BLUUK llomnval Disassembly 1 D ain engine i A 1 Remove engine assembly as outlined earlier in 2 Remove oil pan this section 3 Remove oil pan front and rear neoprene oil 2 Seliafalff ml l fl m nQl seals 3 Use engine stand to support engine assembly 4 Remove oil pas side gaskets 4 Remove cylinder head covers l 5 Thoroughly clean gasket surfaces of oil pan 4 5 Remove rocker arms and bridged pivot assem and engine block Remove all sludge and dirt from oil bllesi lloosleninghefhdwpscrew a turn at a time to pan avoi rea mgt e ri ge 6 Remove rear main bearing cap 6 Remove Dush 0d5 7 Remove and discard lower seal iemove intake mangold assembly emove va ve tappe NOTE rp more zehhfree operation the upper sha 9 Remove cvlinder heads and l e lower seal halves must be replaced in pairs h 10 P0 tl0 dDl5t i one 8t 8 l l near lmuolfldof t eir strc e an use ri ge reamer o remove any ri ge 8 Clean main bearing cap thoroughly to remove from 0 l1d of lgyllndef walls d b U d a gea y 11 emove amper pu ey an vi ra ion amper 9 Loosen all remining main bearing eapscrews 12 Remove timing case cover V 10 With a brass drift and hammer tap the upper 13 Remove Bl Oll and l m0V 0 1 Pan seal until sufficient seal is protruding to permit pull 14 Remove F ll ff ing Sealout c0mp em y 15 Remove connecting rod bearing caps and in serts and keep in same order as removed lnslallaliun NOTE Connecting rods and caps are stamped with 1 Wipe reel surface of the cranlralwfl clean and the number ofthe rphhaer to which they were osserh then oil lightly bled 2 Coat block contacting surface of the new upper seal with soap and lip of seal with engine oil fig h 16 Removi corineictinlg rod gid pistlarilaasgmblies 1 28 t roug top o cy in er ores e care A con 3 Install upper seal into engine block necting rod saga do Amt scratch oormectmg rod asorcyin erwa s NOTE The lip ofthe seal must farce to the front of loam the engine NOTE Pieces of rubber hose can be pushed over the rod bolts to prevent damage to the rod journals 4 Coat both sides of new lower seal end tabs with Jeep Gasket in a Tube RTV silicone or 17 Remove oil pickuptube and screen assembly equivalent being careful not to apply sealer to lip of 18 Remove main bearing caps and inserts seal 19 Remove crankshaft