Ford Parts Wiki | GM Parts Wiki
Home | Search | Browse
|
Technical Service Manual January 1975 |
|
Prev
 Next
Next
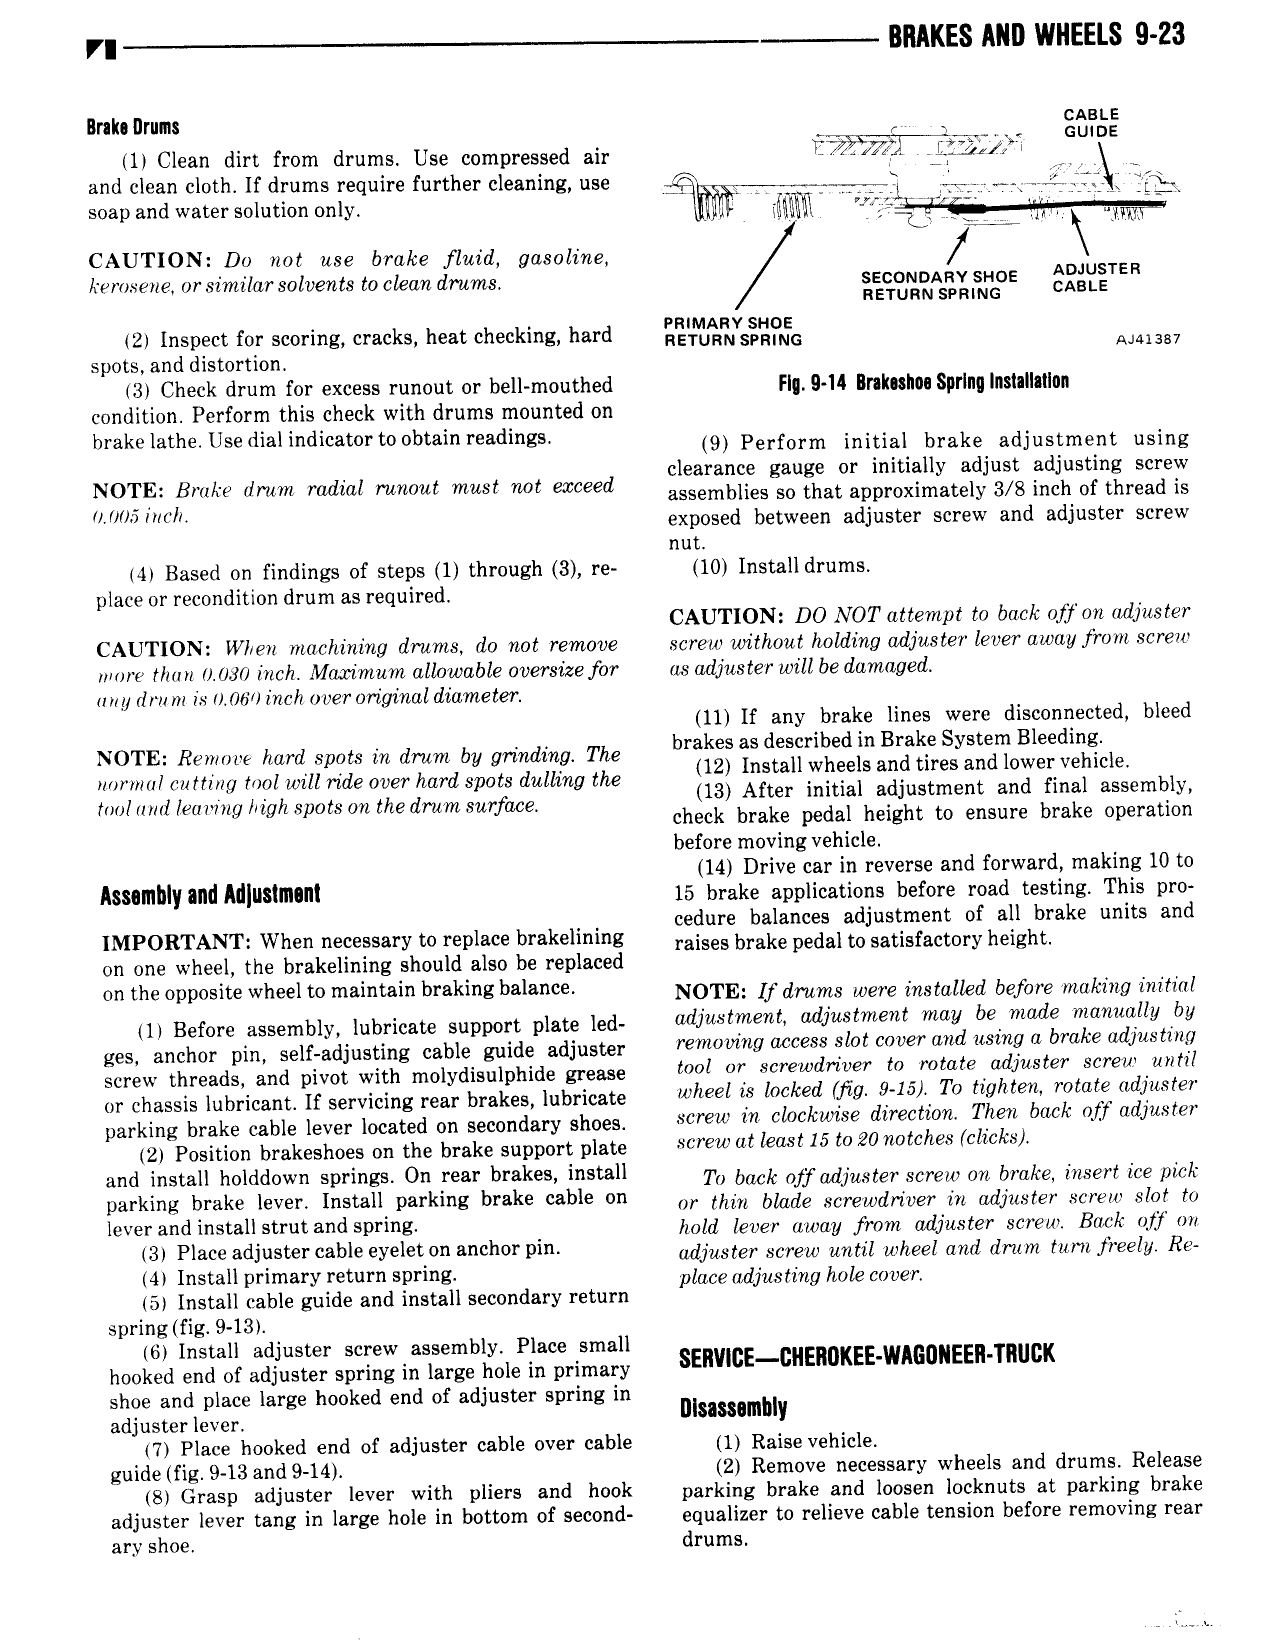
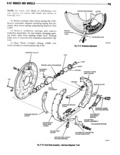
r BRAKES ANI WHEELS 9 23 Brak I1rum F Emi 5 1 Clean dirt from drums Use compressed air lTiil T Z and clean cloth If drums require further cleaning use to QQ E soap and water solution only l llllm CAUTION Do not use brake fluid gasoline kerosene or similarsolvents to clean drums SECONDARV sl lc E ADJUSTER serum seams A E 2 Inspect for scoring cracks heat checking hard f 3jVs G A J 41387 spots and distortion 3 Check drum for excess runout or bell mouthed Fl 9 14 BrI slI S Il lIl Ins1 IIIlIlll condition Perform this check with drums mounted on brake lathe Use dial indicator to obtain readings 9 Perform initial brake adjustment using clearance gauge or initially adjust adjusting screw NOl1 l B l dm mdml mmmt must mt exceed assemblies so that approximately 3 8 inch of thread is l O h exposed between adjuster screw and adjuster screw nut 4 Based on findings of steps 1 through 3 re 10 Install drums place or recondition drum as required CAUTION DO NOT attempt to back off on adjuster CAUTION When machining drums do not remove screw without holding adjuster lever away from screw more thu n J l 0 inch Maximum allowable oversize for as adjuster will be damaged o n g rlrn rn is 1 06 1 inch over original diameter 11 If any brake lines were disconnected bleed NOTE Remove hard spots in drum by grinding The bmlfgs S dsilfrlliledfn Billy Syslinf Bleeigglgh nogmullcfutting toolttoill ride olterctmrd gpg dullmg the 213 3 riiggls Zgjuslxlgle aggegnal lggembly loo nn earring ig spots ont e rum sur dce check brake pedal height to ensure brake operation before moving vehicle 14 Drive car in reverse and forward making 10 to ISSSIIINY illd M IlSiIII IIl 15 brake applications before road testing This pro dure balances adjustment of all brake units and IMPORTANT When necessary to replace brakelining igises brake pedal to satisfacmry height on one wheel the brakelining should also be replaced Op the Opposite wheel to malmalp prakmg palapca NOTE If drums were installed before making initial 1 Before assembly lubricate support plate led l ljV lT l l Udflislmelll may b made mlnllllflly tbl gesv anchor pint 5eh adjuSm tg cable guide adjuster removing access slot cover and using a brake adjusting Screw threads and hivot with mhlydisulhhide grease tool or screwdriver tormtatetadjuster screw lurztil or chassis lubricant If servicing rear brakes lubricate wheel F lpcked mp 1 TO tlghtwh what adluimi parking brake cable lever located on secondary shoes r V Clpckwlw d e tw Them back Off dJ igl 2 Position brakeshoes on the brake support plate L EV ut least 15 to 20 lwcchgs Clwk l and install holddown springs On rear brakes install Tl back ojflyijnster screw on brake insert ice puck Darlene brake lever l ll i l s l l l l l or that inode me adam in adjuster screw sun to l V l a dl l all S l l and Spring hold lever away from adjuster screw Back ojf on 3v Plmadaustercsble v l l l rv adjuster screw uma anger and drum turn jazzy Ra 4 Install primary return spring place adjusting hole cO e j 5 Install cable guide and install secondary return spring fig 9 13 6 install adjuster screw assembly Place small hooked end of adjuster spring in large hole in primary sElwmE c ERuKEE wAE0 EEn TnucK shoe and place large hooked end of adjuster spring in V Illsassambly adjuster lever 7 Place hooked end of adjuster cable over cable 1 Raise vehicle guidelfig 9 13 and 9 14 2 Remove necessary wheels and drums Release 8 Grasp adjuster lever with pliers and hook parking brake and loosen locknuts at parking brake adjuster lever tang in large hole in bottom of second equalizer to relieve cable tension before removing rear ary shoe drums