Ford Parts Wiki | GM Parts Wiki
Home | Search | Browse | Marketplace | Messages | FAQ | Guest
|
Technical Service Manual January 1975 |
|
Prev
 Next
Next
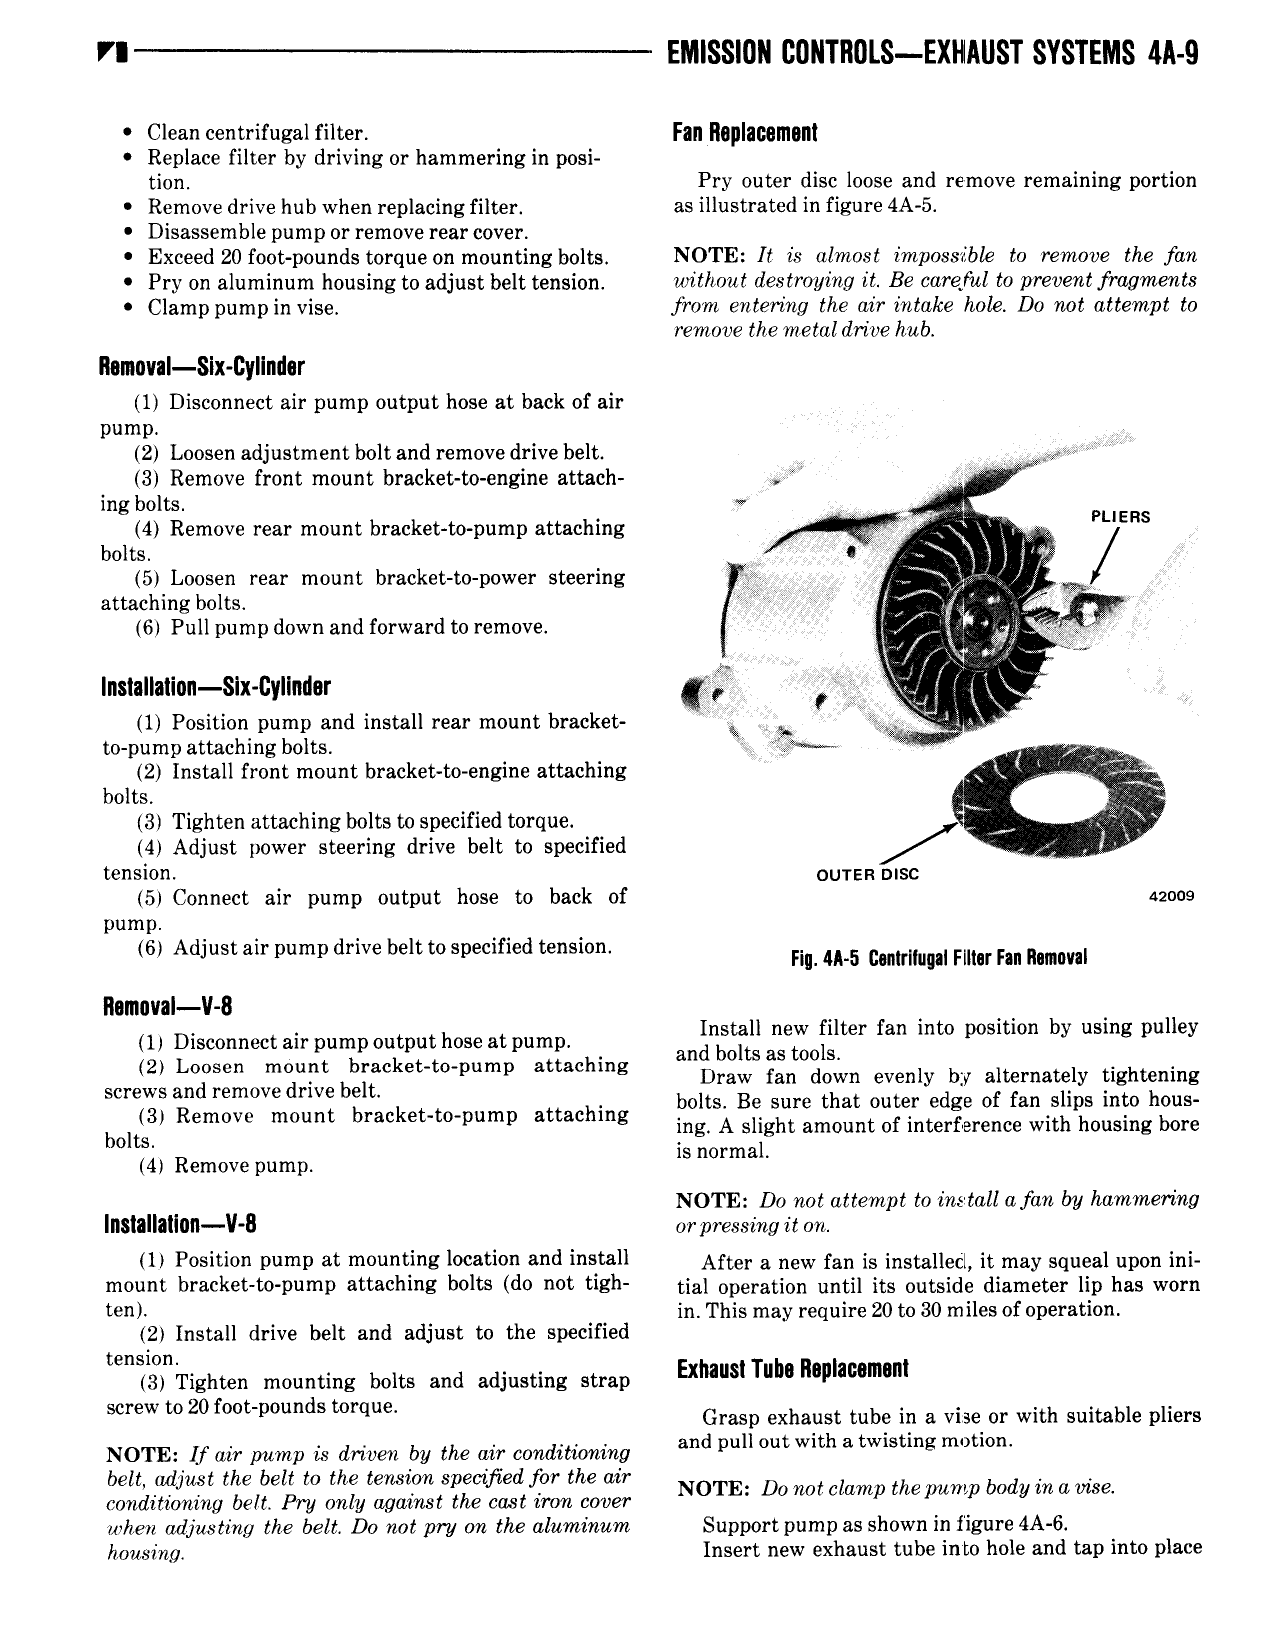
EMISSIUII C0llTR0lS EXllllllST SYSTEMS 4ll 9 Clean centrifugal filter Fill ll0 Illl58lI1 lIIl Replace filter by driving or hammering in posi tion Pry outer disc loose and remove remaining portion Remove drive hub when replacing filter as illustrated in figure 4A 5 Disassemble pump or remove rear cover Exceed 20 foot pounds torque on mounting bolts NOTE It is almost impossible to remove the fan Pry on aluminum housing to adjust belt tension without destroying it Be coretul to rreventfraurwnw Clamp pumpin vise from entering the air intake hole Do not attempt to remove the metal drive hub Rtnnval Slx Cyllndar 1 Disconnect air pump output hose at back of air pump 2 Loosen adjustment bolt and remove drive belt l 3 Remove front mount bracket to engine attach ing bolts l 4 Remove rear mount bracket to pump attaching Z Pl IERS bolts V j ji 5 Loosen rear mount bracket to power steering gv r l attaching bolts j i ij v 6 Pullpump down and forward to remove l Q l 1 li 2 4 x f Insiallaimn Slx ltyllmlor 2 1 Position pump and install rear mount bracket ih K I r to pump attaching bolts r Y I J 2 Install front mount bracket to engine attaching lx J 2 bolts I 3 Tighten attaching bolts to specified torque f 4 Adjust power steering drive belt to specified l tension oures msc 5 Connect air pump output hose to back of nous pump 6 Adjust air pump drive belt to specified tension Fil 4 5 cmmluw Fm nn mm llamavaI ll 8 rn Disconnect an pumpoutputhoseatpump an tga g 0 r fe mm by mg pulley scsi l0 n0 1 b T 1cket t0 p mp auachmg Draw fan down evenly by alternately tightening 3 Remove t brAcket t0 um atmchin bolts Be sure that outer edge of fan slips into hous bolts mmm p p g ing A slight amount of interference with housing bore is normal 4 Remove pump NOTE Do not attempt to install a fan by hammering lIISlIllIllIIl l V B or pressing it on 1 Position pump at mounting location and install After a new tan is installed it may squeal upon ini mount bracket to pump Machine bolts do not Meh tial operation until its outside diameter lip has worn ten in This may require 20 to 30 miles of operation 2 Install drive belt and adjust to the specified tension 3 Tighten mounting bolts and adjusting strap Exlmlsl Tub nalllaumam screw to 20 foctipounds mrqlm Grasp exhaust tube in a vise or with suitable pliers NOTE U air pump Ls driven by the air conditioning and pull Ou mth a twisting mimon belt udjust the belt to the terwion speotfed for the air conditioning belt Pry only against the cast iron cover NOTE Domlclump the pump body mamm when adjusting the belt Do not pry on the aluminum Support pump as shown in figure 4A 6 housing Insert new exhaust tube into hole and tap into place