Ford Parts Wiki | GM Parts Wiki
Home | Search | Browse | Marketplace | Messages | FAQ | Guest
|
Technical Service Manual January 1975 |
|
Prev
 Next
Next
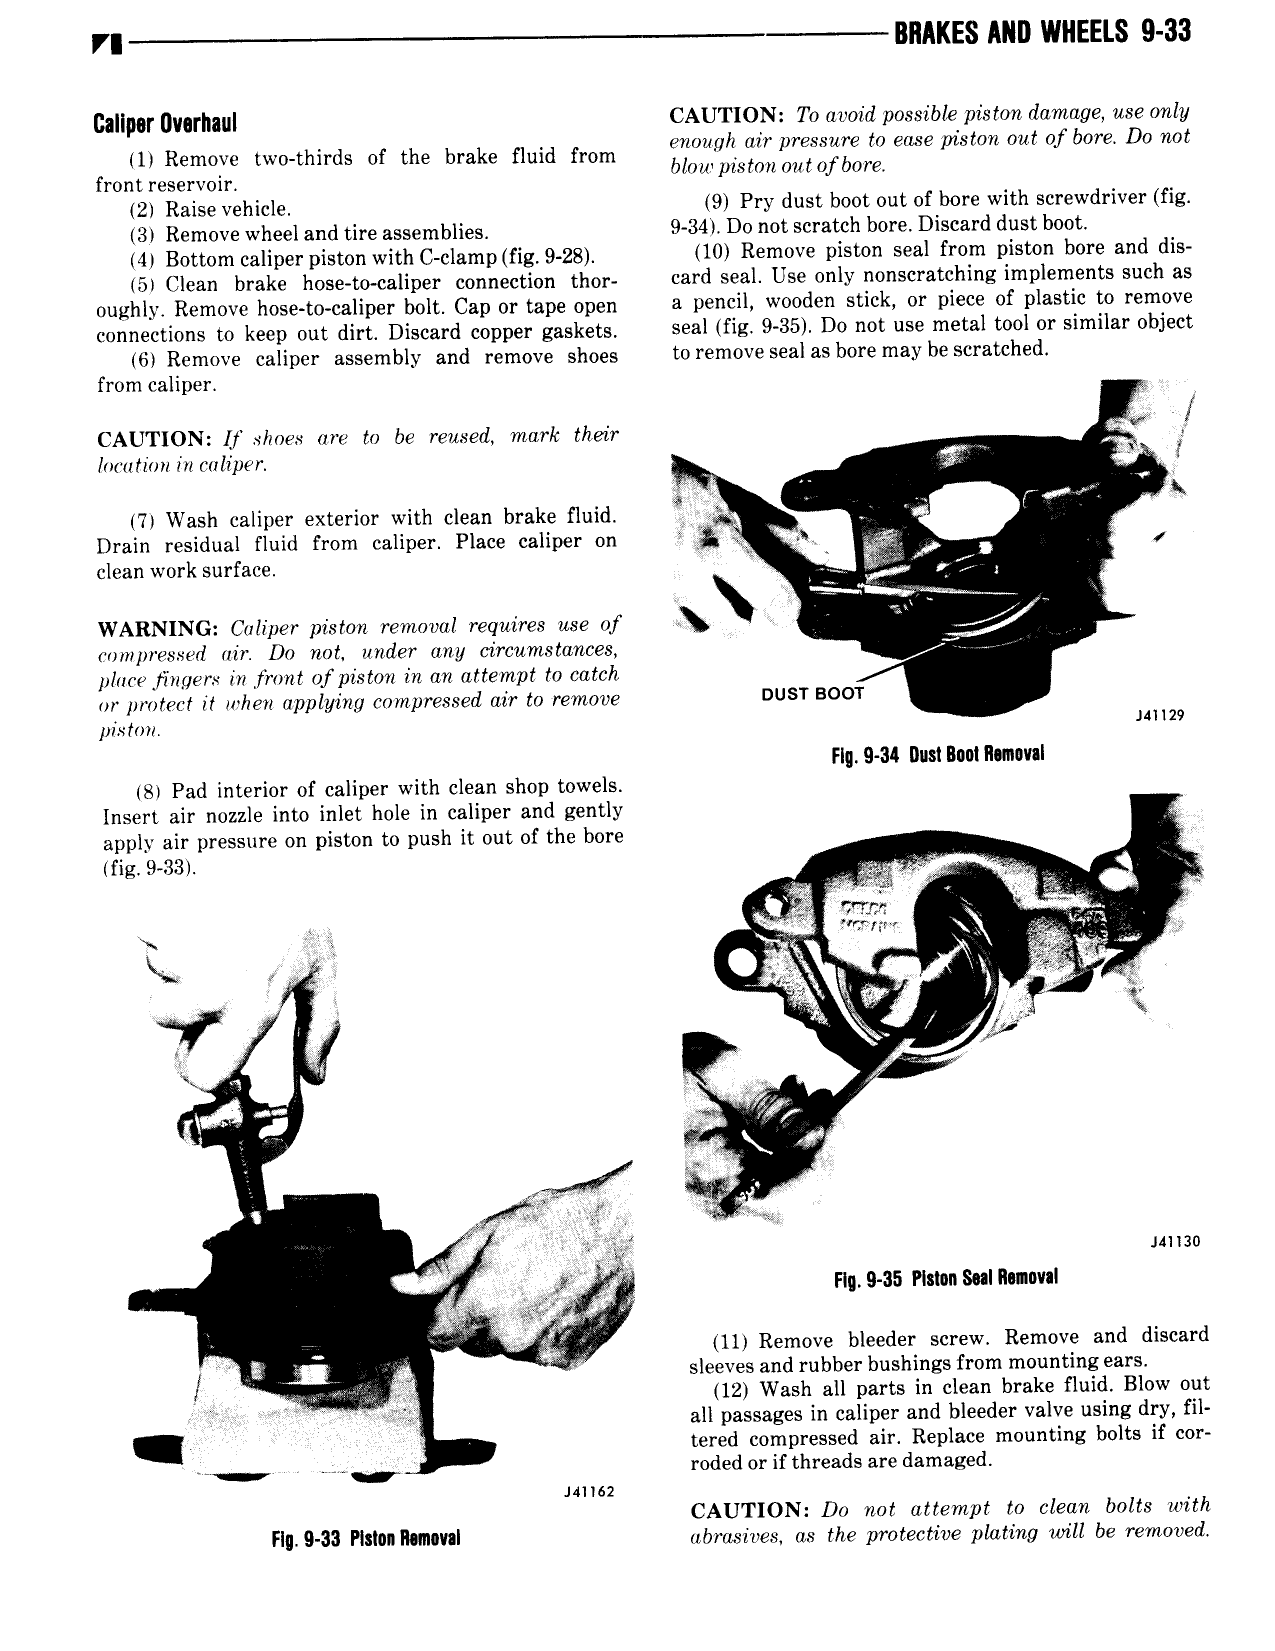
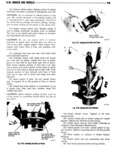
VI BRAKES INI WIIEELS 9 33 cllipbf l V I llllIl CAUTION To avoid possible piston damage use only U Remove twmthirds 0 the brake fluid from enough air pressure to ease piston out of bore Do not from reservoir blow piston out ofbore 2 Raise vehicle 9 Pry dust boot out of bore with screwdriver fig 3 Remove wheel and tire assemblies 9 34 Do not scratch bore Discard dust boot 4 Bottom caliper piston with C clamptfig 9 28 10 Remove piston See from piston bore and dis 5 Clean brake hose to caliper connection thm card seal Use only nonscretching implements such as oughly Remove hose to caliper bolt Cap or tape open 3 P 2il wooden Stlckt OY Pl 9 of Plastic to m0V connections to keep out dirt Discard copper gaskets seal fig 9 35 Do not use metal tool or similar object 6 Remove caliper assembly and remove shoes to remove seal as bore may be scratched from caliper CAUTION lf shoes arc to he reused mark their I V location in caliper gy z V l L U T 7 Wash caliper exterior with clean brake fluid s V Drain residual fluid from caliper Place caliper on ex M wig l I clean work surface 5 I WARNING Caliper piston removal requires use of M compressed air Do not under any circumstances 7 place H 11gers in front ofpiston in an attempt to catch or protect it when applying compressed air to remove DUST BOOT piston mm Fly 9 34 Ilusi Baoillunoval 8 Pad interior of caliper with clean shop towels Insert air nozzle into inlet hole in caliper and gently apply air pressure on piston to push it out of the bore fig 9 33 Fm t o A py A gd V pj iw a X ii V xv Ly K it Q V A Q N mf Y i rf misc M Flg 9 35 Plmn Sullnnnval i 11 Remove bleeder screw Remove and discard E 1 9 sleeves and rubber bushings from mounting ears 12 Wash all parts in clean brake fluid Blow out W all passages in caliper and bleeder valve using dry fil tered compressed air Replace mounting bolts if cor rt 7 Q roded or if threads are damaged mm CAUTION D0 not attempt to clean bolts with Flll 9 33 Pitlnn Rlmtvll abrasives as the protective plating will be removed