Ford Parts Wiki | GM Parts Wiki
Home | Search | Browse | Marketplace | Messages | FAQ | Guest
|
Technical Service Manual January 1975 |
|
Prev
 Next
Next
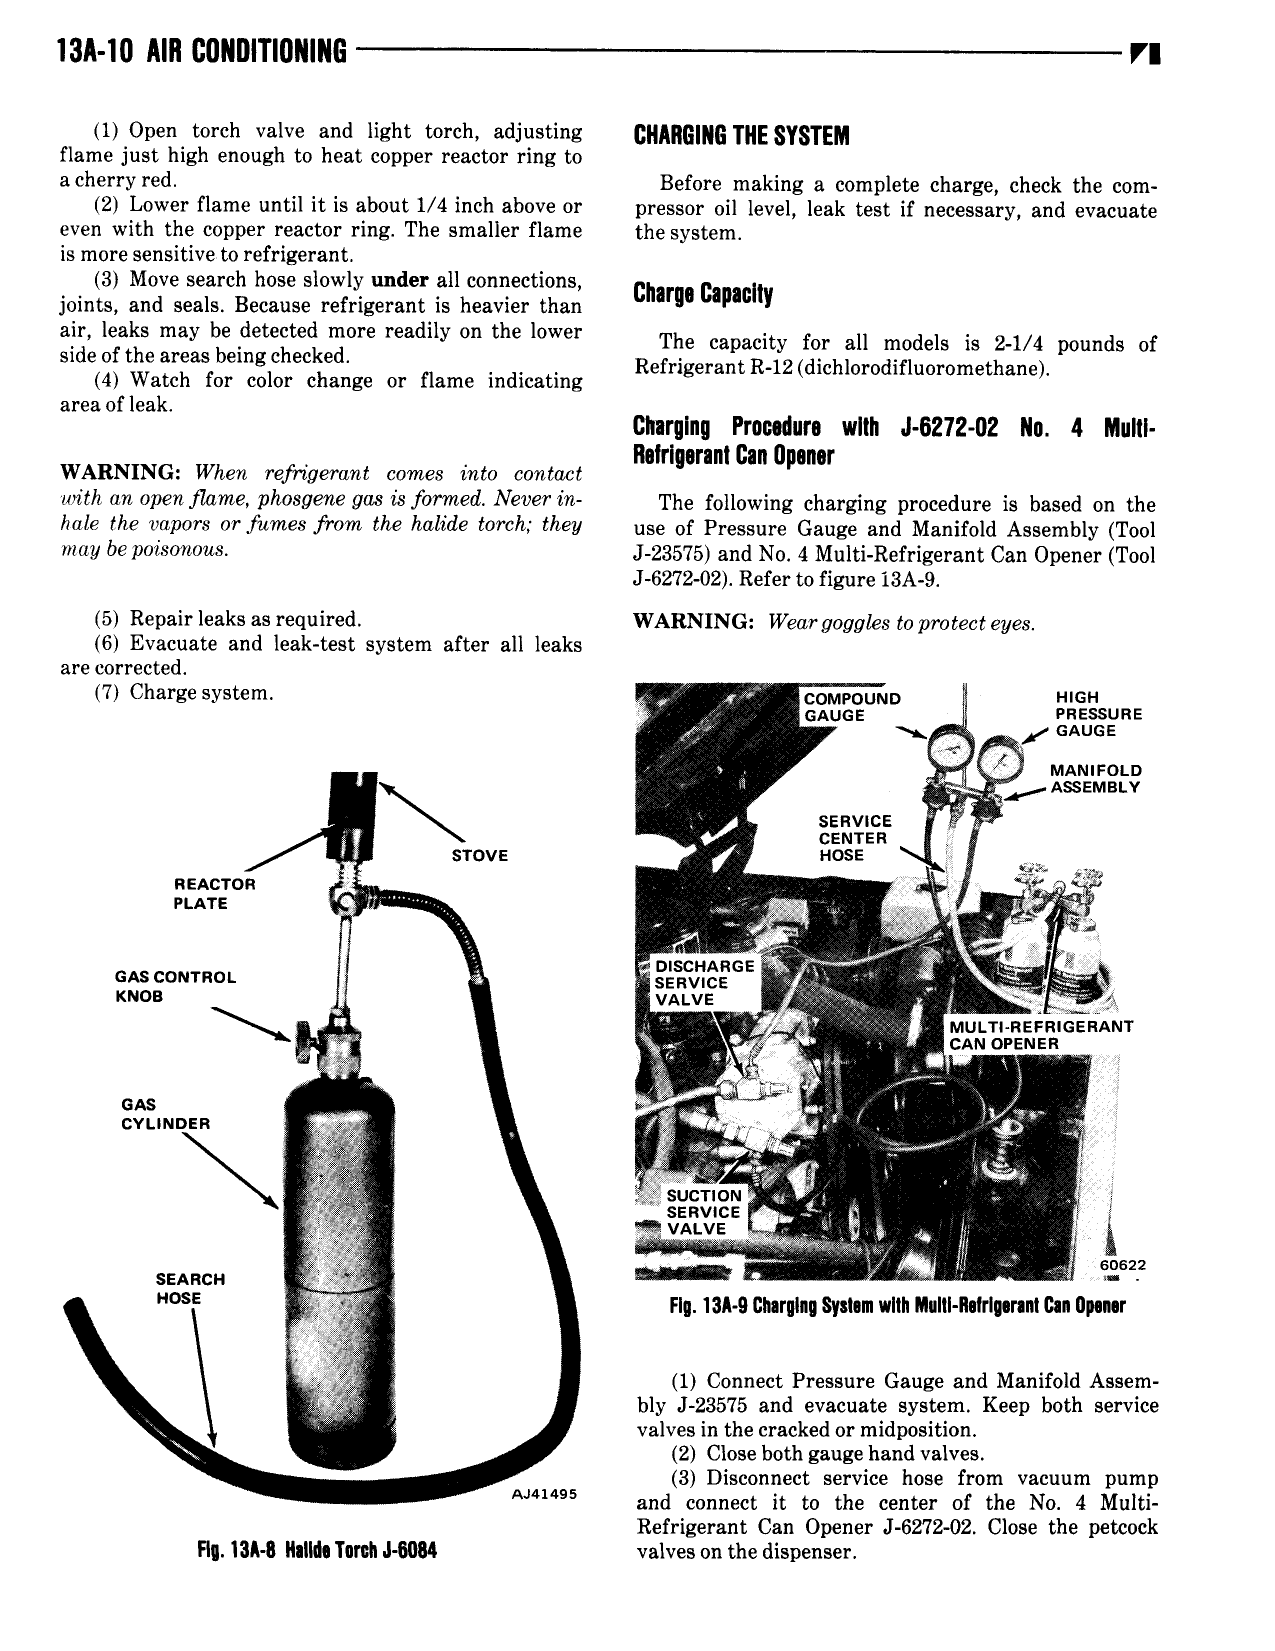
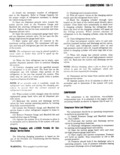
13A 10 Illll CUNDITIUIIINE VI 1 Open torch valve and light borch adjusting c A Q SYQTEM flame just high enough to heat copper reactor ring to acherry red 4 4 Before making a complete charge check the com 2 Lower flame until 1t is about 1 41nch above or pressor oil level leak test if necessary and evacuate even with the copper reactor ring The smaller flame the system is more sensitive to refrigerant 3 Move search hose slowly under all connections joints and seals Because refrigerant is heavier than cn lhlmllly air leaks may be detected more readily on the lower The capacity for all models is 24 4 pounds of side of the areas being checked 4 Watch for color change or flame indicating Refr1gerantR 12 dichlorodnfluoromethane area of leak clnrglng Prmdura wltln J 6272 02 Nu 4 Multi Relrl uranlllanll n r WARNING When refrigerant comes into contact ll with an open Name phvsyerw new reformed Never in The following charging procedure is based on the heie the 17078 OT fume 9 WOM the halide Wtfhi hel use of Pressure Gauge and Manifold Assembly Tool MGI be P01S0Yl0 5 J 23575 and No 4 Multi Refrigerant Can Opener Tool J 6272 02 Refer to figure i3A 9 5 Repair leaks as required WARNING Wear goggles to protect eyes 6 Evacuate and leak test system after all leaks are corrected 7 Charge system I 4 comeouno L more cause l vnzssuns A anus Il 0 mmnsoto v mA Asszms v 4 SEE L 4 c li srovs nose 1 i we nncron z i Q nur Q F c og X a L fh 2 e 4 T L I i Jl E ll mos VALVE r V V A I MULTI REFRIGERANT 5 W cmovzuzn gal GAS Ze lu Y j cvunnsn Tv I Civ Q ii c r t ftiirt 5 wc 1 e 3t i V 1 vdtvz L 4 I i X 5 Q nn M 2 E Flg 13A 0 Charging Syslam wlth Ilnlll Ilalrlgmnt Can Ilpmr 1 Connect Pressure Gauge and Manifold Assem bly J 23575 and evacuate system Keep both service valves in the cracked or midposition 2 Close both gauge hand valves 3 Disconnect service hose from vacuum pump A m 5 and connect it to the center of the No 4 Multi Refrigerant Can Opener J 6272 02 Close the petcuck H 3I I Illlllll TQM J WN valves on the dispenser