Ford Parts Wiki | GM Parts Wiki
Home | Search | Browse
|
Technical Service Manual January 1975 |
|
Prev

 Next
Next
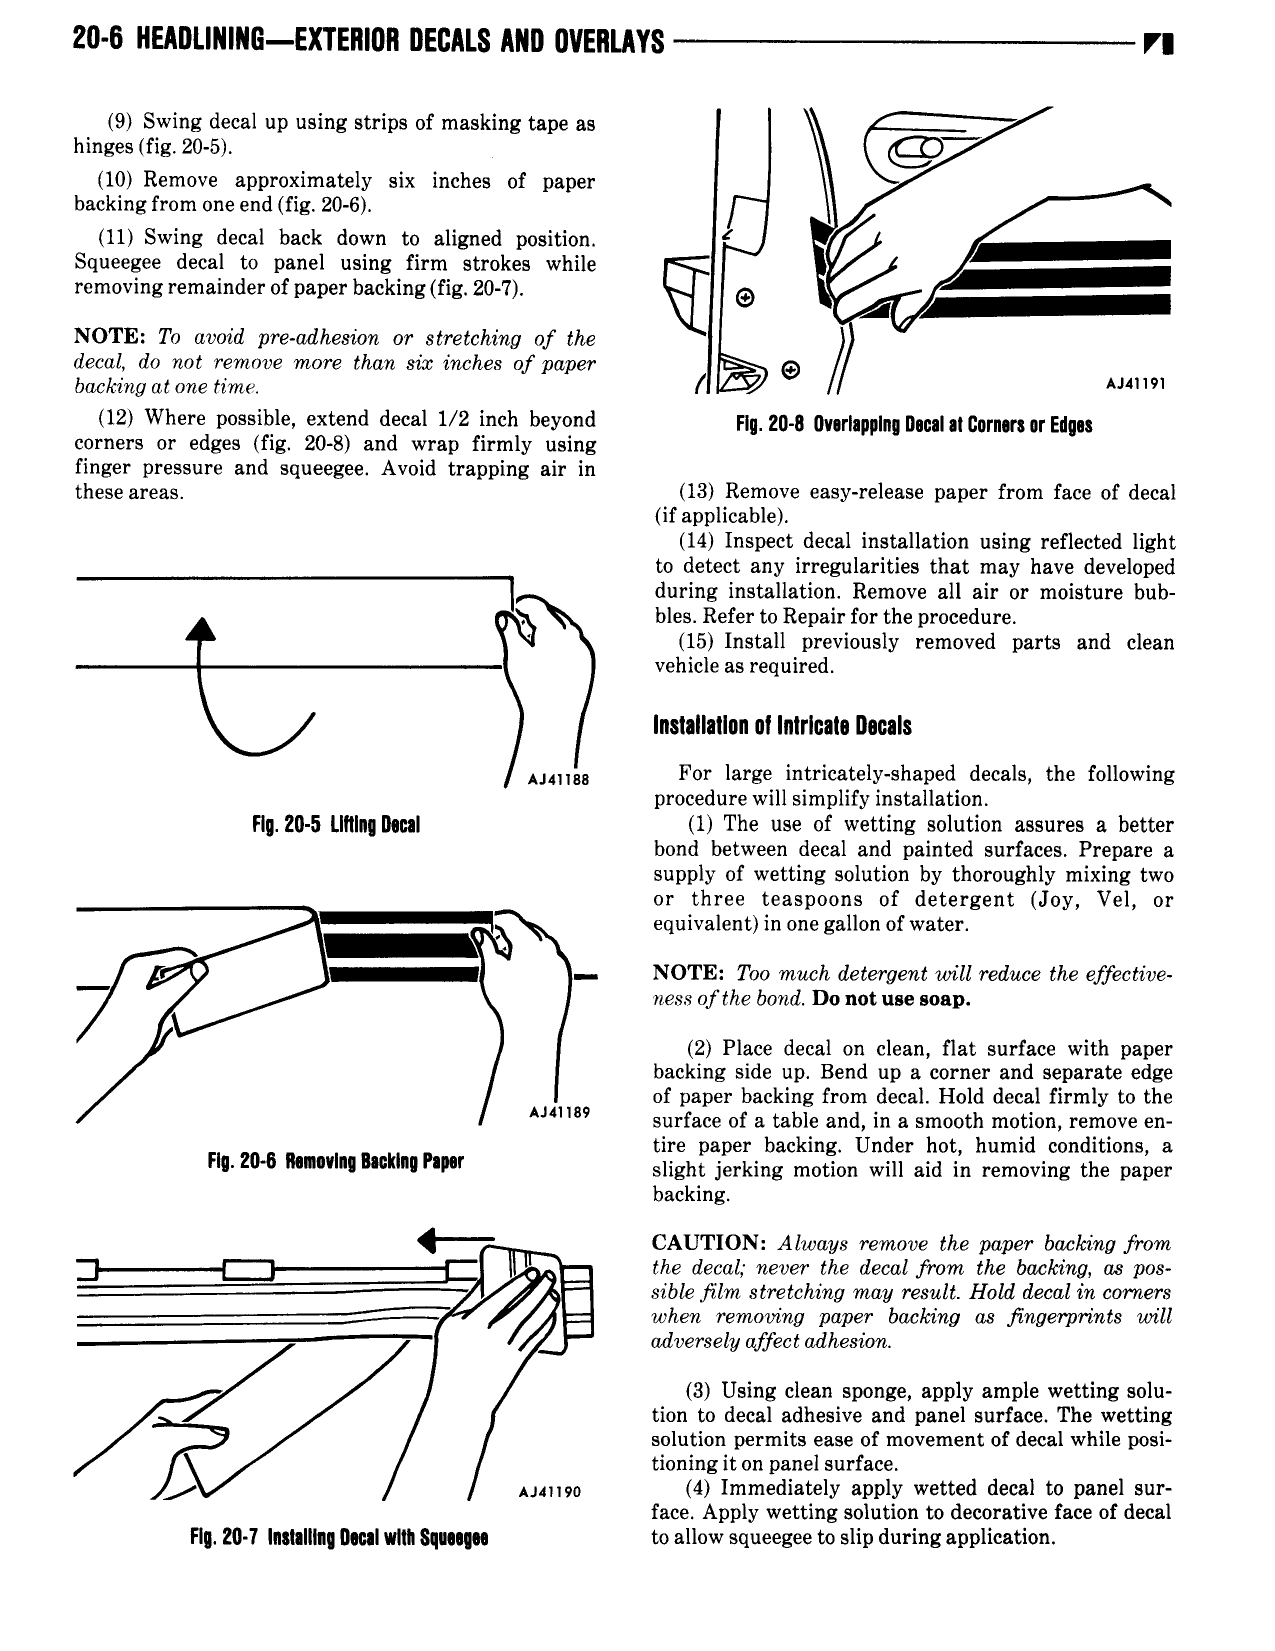
20 6 HEADL NI G EXTEIIII H DECALS MII IVEIILAYS r 9 Swing decal up using strips of masking tape as hinges fig 20 5 1 10 Remove approximately six inches of paper backing from one end fig 20 6 11 Swing decal back down to aligned position Squeegee decal to panel using firm strokes while removing remainder of paper backing fig 20 7 G NOTE To avoid pre adhesion or stretching of the decal do not remove more than sir inches of paper Q bac ring at one time l l 12 Where possible extend decal 1 2 inch beyond Hmm 0y r pmmgnrnm rEdu corners or edges fig 20 8 and wrap firmly using finger pressure and squeegee Avoid trapping air in these areas 13 Remove easy release paper from face of decal if applicable 14 Inspect decal installation using reflected light to detect any irregularities that may have developed I during installation Remove all air or moisture bub bles Refer to Repair for the procedure 15 Install previously removed parts and clean vehicle as required lnslallallnn ul lnlrIcal Decals umu For large intricately shaped decals the following procedure will simplify installation Fly 20 5 L li n D I 1 The use of wetting solution assures a better bond between decal and painted surfaces Prepare a supply of wetting solution by thoroughly mixing two or three teaspoons of detergent Joy Vel or equivalent in one gallon of water NOTE Too much detergent will reduce the effective ness of the bond D0 not use soap 2 Place decal on clean flat surface with paper backing side up Bend up a corner and separate edge of paper backing from decal Hold decal firmly to the Mmsl surface of a table and in a smooth motion remove en tire paper backing Under hot humid conditions a Hmm 6 MM mu PI slight jerking motion will aid in removing the paper backing CAUTION Always remove the paper backing from the decal never the decal from the backing as pos sible film stretching may result Hold decal in corners when removing paper backing as jingerprints will adversely affect adhesion 3 Using clean sponge apply ample wetting solu tion to decal adhesive and panel surface The wetting solution permits ease of movement of decal while posi tioning it on panel surface Ammo 4 Immediately apply wetted decal to panel sur face Apply wetting solution to decorative face of decal FI Z0 7 In l IIll DONI VMI SQIIIQOI to allow squeegee to slip during application

 Next
Next